So, ready to learn the easy trick?
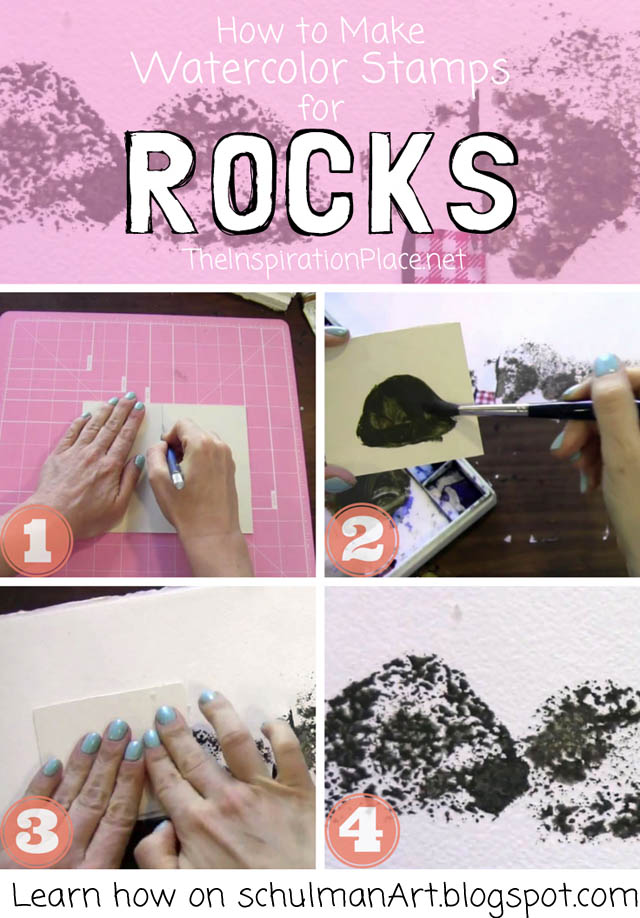
1) First you need a piece of mat board or illustration board. If you have an old mat board lying around that is usually cheaper than illustration board anyway and I found it actually works slightly better. Cut it to about the size of a postcard. The exact size doesn't matter.
2) Paint a blob of your watercolor paint on one side of the mat board about the size of your "rock." You want to use the consistency of melted ice cream. The mixture should not be too watery or you will not be satisfied with your results. You want to mix together earth tones...and this time, don't worry about mixing mud! Mud makes for great looking rocks. Every painting needs a bit of "mud" in it
3) Press your stamp firmly down. You may want to practice on a piece of scrap paper. In fact, I've noticed that my first stamp is usually the worst-- kind of like when you make pancakes. You may have to "break in" the stamp.
4) The result is going to depend on the "gushiness" of your paint layer. If you don't use a lot of paint, then you will get a drier texture as shown above. You can leave it as is to make it look like snow on rocks or light on rocks or you can put a glaze on top but still maintain that pebbly texture. If you use a paint color that is more greenish then, the stamp will make it look like a mossy rock. If you use a lot of paint, then your stamp will leave "veins" which is also quite a nice texture effect which mimics the appearance of lichen.
|


